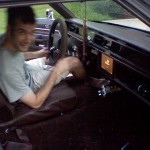
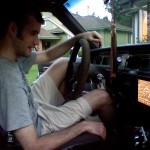
Carputer Part 3: Installation

And now, ladies and gentlemen, the next exciting installment in the Carputer series!

MPM: NEVER BEFORE IN THE HISTORY OF CAR ACCESSORIES HAVE SO MANY SMALL ELECTRONIC GIZMOS COMBINED TO MAKE A SINGLE GIZMO SO FRIGGIN’ SWEET…

Yes, yes. Anyway, I would like to –

MPM: AN ORDINARY CAR…

Ahem. What?

MPM: AN EXTRAORDINARY JOURNEY…

Yes, but wait, what? This is just about the carputer itself, the trip is discussed elsewh-

MPM: AND ONE MAN’S VISION TO UNITE THEM ALL…

Okay, just keep going. I think this time you actually won’t stop until you get to the-

MPM: THIS SUMMER…
Zach: I think it’s finally ready.
Zach’s Mom (V.O.): Now you take it easy out there, son. You’ve been working on that thing all day.
Zach: I’m so close I can… I can taste it.
MPM: ZACH BARDON…
Zach: Okay, let’s do this. (deep breath)
(sound of engine starting)
Zach’s Dad: (approaching) You got it working?
MPM: AND THE LOVEMOBILE, IN…
Car (V.O.): Welcome, Zach.
MPM:

CARPUTER 3: THE INSTALLATION

(sound of car driving away)
Car (V.O.): Turn… left… in… 500… feet.

Actually, that was pretty cool how you talked all big like that. Although if a person installing electronics in his car is movie material, we are an entertainment-starved culture, to be sure.

For those of you just joining us, I have previously described how I realized a carputer would be friggin’ sweet, so I built one, then put all the awesome software on it that I wanted. I will now describe Step 3 in the carputer process – getting all the aforementioned pieces in the car and connected so they work.

The Master Plan

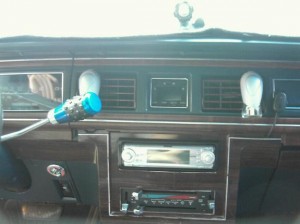
The plan in a nutshell: fused power wire running on right side from battery to trunk. Mainboard with power supply under passenger seat, touchscreen in dash (powered from power supply, not battery), foldable keyboard stowed under the seats when not in use. GPS receiver on back deck. Wi-fi antenna mounted on hood in place of previous radio antenna. Audio running down left side from carputer to trunk. Accessory wire run from previous stereo’s connector to power supply to serve as power switch.

The plan outside of the nutshell looks like this:

How did that ever fit in a nutshell?

Exciting eh? Turns out the insides of nutshells are boring and leave out a lot of words, like articles and linking verbs. Let me give you more juicy details from outside the nut.

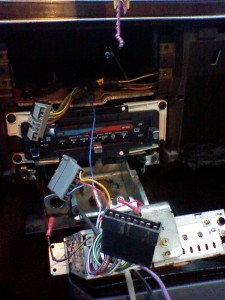
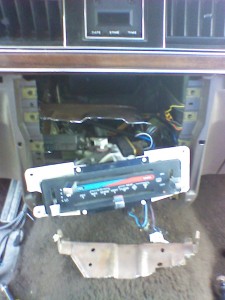
First, the touchscreen. As I said, my plan was to remove the existing head unit,

You served me long and well.

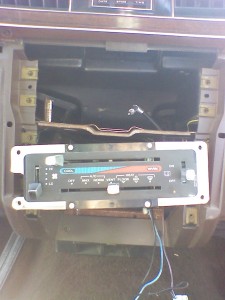
move the climate controls down lower,

Also, shaken but not stirred.

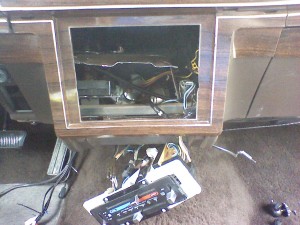
then cut out the plastic divider between them,

A river runs through it.

in order to use the entire space for the touchscreen. As it turned out, my plan could not have been more awesome.

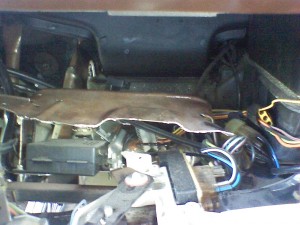
Midway through the above, I held up the touchscreen to the slot and discovered that there was also a metal divider inside separating the two DIN slots (see above) that had to go. It was too integrated into everything else to remove, so I just Dremeled off the front inch or two.

Go go Dremel Mototool!

PRO TIP: cutting metal in a very confined area surrounded by other parts, including fairly important stock wire bundles is not the simple task that being able to write about it casually in one sentence might make it seem. To be. Yeah, it was more like that sentence – difficult.

Hint: it is.

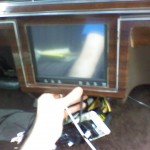
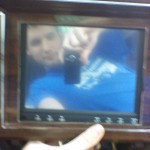
After that, there was enough space for the touchscreen!

Touchscreen is actually the same word as kitchen sink in my native language.

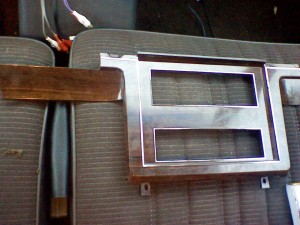
The next thing to think about was how to attach said touchscreen. For help in brainstorming, I held the screen in place and held the trim piece over it.

By nifty, I actually mean nifty. Allow myself to introduce... myself.

And – it looked great. It was the perfect size for that space; when I screwed the trim piece back on the screen was held securely in place by just pressure and friction! No crazy jerry-rigging necessary.

“That’s awesome!” exclaims Attractive Girl, ever supportive of that which is awesome.

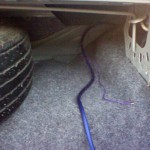
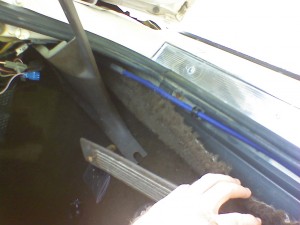
Next step: THE POWER. I mentioned how I had purchased an 8-gauge Kicker wiring pack, which made this step fairly simple. I simply ran the cable from the engine compartment back to the trunk, following the car’s existing wiring channel. The trickiest part was finding a way through the firewall, but I was able to locate a little rubber bushing about the right size that was unused in my no-power-options Vic, and pushed it through that. Again, that was one sentence, but it required the help of another person and took quite a few minutes and exploratory feeling and prodding. From there, it was a simple matter of unscrewing the “running boards” and prying up some carpet and plastic trim to expose the wiring channel, then running the cable down that into the trunk, where I cut off the excess wire.

By Edgar Allen Poe-dunk

I did need to spend a little time adding in a T connector near the passenger seat, where I would be running a smaller power line over to the carputer. I waited until I had installed the power cord almost exactly where it was going to be, before pulling a little slack in the cord, cutting a little hole in the under-seat carpet, and running the cord under the carpet over to that hole. Only then did I cut the power wire and splice in that T connector.

“Right, so you’ve got power going under your seat and to the trunk, and you’ve got a completely unconnected touchscreen sitting nicely in your dash. When do we get to the juicy stuff we saw in the preview?”

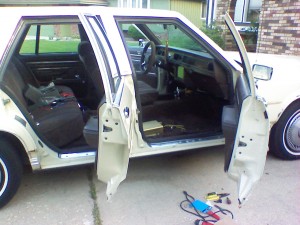
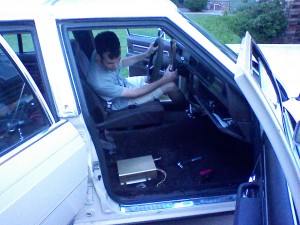
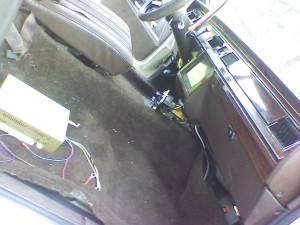
Trust me, I felt the same way. Next, it was time to get down to business and connect all of the many things that needed to be connected to the carputer itself. So I took out the passenger seat, and attached the carputer to the carpet, using the case’s handy peg-mounting system. (Pro tip: don’t try to drill holes in carpet, you’ll make a mess. Just slash little holes in it with a knife.)

Bujeebies.

Now I had nine wiring tasks ahead of me:

The Nine Wiring Tasks

  1. Power to the Opus power supply. A cinch: just had to run a few wires from the T connector to the Opus’s power wires.
  2. Grounding the carputer. Also fairly easy, since the seat bolted directly to the frame. I could just stick the ground wire from the Opus under the washer before tightening the bolt for a very solid, direct ground.
  3. Connecting the Opus’s power-on line to the car’s accessory power for automatic power-on and -off with ignition. This is one of the very cool things about the Opus. Since I was no longer using the previous head unit connector, I simply located the accessory wire in that using a voltmeter and ran a wire from there.
  4. Power from the Opus to the touchscreen. The Opus system came with additional power out for the screen, which is excellent because it means the screen will turn on and off with the carputer. It also means the screen is protected from under-/overvoltage like the rest of the carputer, which it would not be if I wired power to it separately. To do this, I had to remove the wallwort-style plug from the monitor to expose the wires, then connect the power out lines from the Opus to that. It was a little tricky because the wires from the screen were quite small. I just guessed which was hot/ground based on color, but it works so I guess either I was right or it didn’t matter. A circuit is a circuit no matter which way the current goes, I suppose.
  5. VGA from the carputer to the touchscreen. I can’t recall at the moment, but I think I didn’t even need a VGA extension cable for this. I ran both this and the touchscreen’s power wires together under the carpet, popping up through a small hole directly in front of the carputer.
  6. External antenna from the wi-fi card to the hood. I had one of those handy-dandy magnetic antennas specifically designed for sticking on cars, and fortunately the cable was long enough, so I was able to run it under the carpet (trying to keep it away from the power line as much as possible), through the unused bushing for wires I didn’t have going to the passenger door, then up and out through the gap between the windshield and the hood. It’s not as nice as a directly replacing the previous radio antenna, but it’s still pretty nice and the 1” of wire that shows is quite inconspicuous.
  7. GPS receiver from carputer USB to the back deck. I mentioned earlier that this is one of the last things I did (other than audio). Until I bought a USB extension, it was sitting on my dash with unsightly wires dangling around. But I finally got the extension, and then I could run the wire down the right side and behind the back seat, finally popping out in the center of the back deck, where the GPS could happily sit and cook on hot days.
  8. RCA audio from the Opus’s RCA outs back to the trunk, where it would eventually connect to the amp. I would have loved it if the Opus had SPDIF out, but alas, only RCA (and a bit noisy at that… I discovered after installing the audio system that the mobo’s onboard audio is not super clean).
  9. Remote-on Yay. switch from the Opus to the trunk, to connect to the future amp. Another super awesome feature about the Opus is that it has a remote-on line, like head units which are designed to work with amps have. This line simply sends a signal to the amp telling it to turn on or off, which is a good idea because a) you don’t need to run switched power to the amp, which would be a pain, and b) the head unit turns on the amp after it is already powered on, thus avoiding the loud POP that could otherwise happen. The Opus has this capability, like a good head unit, so I was happy to take advantage of it.

Tools You Need To Do the Same

  • Screwdrivers/wrenches/sockets of whatever kind you need to take apart your car.
  • Wire cutters/crimpers
  • Voltmeter
  • Flashlight
  • Dremel Mototool, including wheels for cutting metal (you’ll use up at least one of those wheels).
  • Utility knife (for trimming 8-gauge wires and cutting carpet)
  • Wire fasteners (I recommend picking up a kit of various gauge connectors)
  • As I recall, I made use of a clamp and needle-nose pliers as well, but I don’t know that those are strictly necessary.

Sound like a lot of wiring? That’s because it was, and it definitely didn’t all get done in one day. All wires were run neatly down existing channels or under the carpet, tucked and fastened in various places so as to minimize risk of both chafing and signal interference.

Then, almost as an afterthought, I connected the keyboard.

Denouement

Finally, everything was connected, exactly as in my plan. I was ready to throw the switch and see if it worked the same in my car as it had on my dining room table.

You can't handle the truth!

And you know the rest because the preview kind of gave it away. Great job Movie Preview Man.

MPM: THEY KNEW TOO MUCH…

Yeah.

Anyway,

And it runs, to boot. The eight satellites told me so!

Friggin’ sweet! You have no idea how satisfying it is to start your car, hear it say “Welcome, Zach,” and then watch it acquire a lock on 8 different satellites.

“What about audio?” complain some nearby teenagers, completely expectedly.

Never you fret, my good teenagers. Do you think that I, a musician, could possibly design a car system that did not include audio as a primary consideration? Impossible! Well, possible… but immensely improbable. The fourth and final article in the Carputer series will describe the installation of the audio, possibly in some kind of cinematic fashion. Oh, and I forgot to mention that the main villain in this particular post, who swore vengeance on the carputer in a very prophetic manner, died – but kind of vaguely. Like, he could have actually lived, possibly even gaining some additional powers or something. Yeah.

Carputer Part Deux: Software

Not long ago, I mentioned how I wanted a carputer, so I made one.

“Actually,” points out Attractive Girl teasingly, “it was quite a while ago. Like, six months ago.”

Fine. Long ago, I talked about how I built a friggin’ sweet carputer.

But just having a bunch of properly connected hardware is only half the battle. The other half is being able to do stuff with it, which when dealing with computers requires something called “programs.” Programs tell the computer how to behave, and the computer is like, “okay.”

The most important program is called the “operating system” (OS). This is the very first program the computer runs when you turn it on. Without an OS, the computer would be like “Here I am! What should I do? Um… wtf.” With an OS, however, the computer is like, “Here I am! What should I do? Oh, all this stuff? Okay.”

The OS is also important because it is like a container program for all the other programs. You can put other programs in it, and if they are designed to work in that OS and then you can run those from within the OS. Note that this means that although some programs are made to work in multiple OS’s, many only work on one specific OS.

“Dude, this is not a Computers for Dummies book,” complains Mr. Yerfulovit. “Just tell us which software you installed.”

Man, I was actually kind of having fun with that. But okay.

OS

OS’s for carputers are not all that different from those those used for desktops, although some are streamlined to use few system resources, or remove functionality not needed in the car environment. My choice of hardware already eliminated a Mac OS (a lot of people are doing super-easy carputers simply by throwing a Mac Mini in their glove compartment or something), so it was down to some variant of Linux or some variant of Windows.

TinyXP takes up only 400MB installed!

I checked out the available carputer software for Linux – but unfortunately, it looked like it required a good bit more tweaking to set up than I was prepared to do, and still had quite a few “issues” being resolved or only on the drawing table. In particular, GPS software would have been an issue. As is often the case in the open source world, too many feature requests and bugs and not enough developers.

So I opted for Windows XP, both because of the out-of-the-box-working software available for it and because of its familiarity. Rather than install one of my legitimate full-featured copies of XP, I tracked down a stripped-down version called TinyXP, which removes a lot of generally unused functionality from XP, and correspondingly reduces memory use and startup time.

Next I installed drivers for everything – all the VIA mobo drivers, touchscreen drivers, wi-fi card drivers, and GPS receiver driver.

“You mentioned something about a ‘front end’…” mumbles the ugly passerby, a little too conveniently.

Yes.

Frontend, Etc.

In the world of carputers, most people opt to use something called a “front end.” In layman’s terms, this means a thingy that you use to do stuff. In front. In a little bit smarter layman’s terms, it means a program that provides a user-friendly interface for your touchscreen (trying to click normal-size buttons on an 8” touchscreen while driving is not advisable) and lets you navigate and operate all of your favorite programs without requiring a keyboard (typing while driving is also not advisable). In Windows-speak, it is essentially a glorified, touch-screen-friendly Start Menu that runs when your computer starts. You may have seen other front-ends in interactive museum displays, airport self-check-in kiosks, or public libraries that time or limit your internet access somehow. In the background, there is the familiar Windows XP desktop, but you can’t get to it because the front end is controlling your user experience. Most available carputer frontends have integration with some kind of audio player, and some provide hooks into GPS programs and web browsers as well.

Looks like we currently have a lock on 8 satellites, Batman.

The front-end I chose is an open-source Windows project called RoadRunner. It interfaces with Winamp for audio (my audio player since way back in the day), has hooks into several of the available GPS programs (but especially the one I planned on using), and has a decent-sized community of users developing skins and plugins for it. Perhaps most importantly, it’s free.

Winamp: never outdated, has lots of plugins, is directly supported by Road Runner.

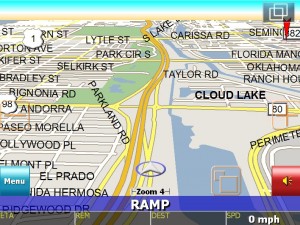
Speaking of the GPS software I planned on using, it was not free, but I can’t imagine any good GPS software ever being free, given that current street maps usually have to be acquired (bought) from some kind of mapping service. I went with iGuidance, which from the discussion on mp3car.com seemed to be one of the best for mobile mapping and remapping. I anticipated missing a few turns over the course of the tour, and wanted a program that could quickly reroute me without me needing to pull over and reconfigure something.

You are on a ramp.  Hopefully you know how to merge (doubtful if you are from Minnesota.)

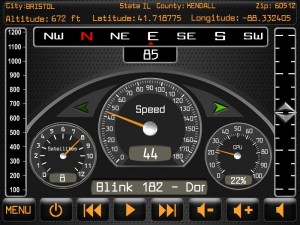
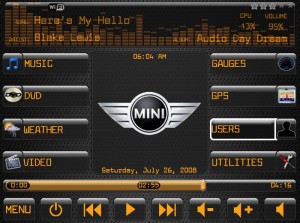
RoadRunner was going to provide the entire experience of carputing, so I also wanted it to look pretty awesome too. The default was nice but could be improved upon. I found a few places where I could get “skins” for it – some of them providing significant additional functionality. I ended up picking a very thorough and involved skin called Digital FX, which was developed by a friggin’ excellent skin developer for RoadRunner who goes by the online moniker JohnWPB.

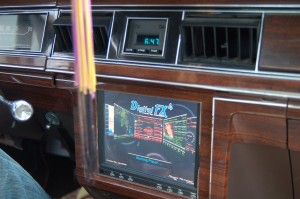
The DigitalFX skin running on Road Runner.

To get RoadRunner and iGuidance to play nicely together, I also needed to install a tiny little utility called XPort, which essentially duplicates the signals coming into a port onto a number of other runtime-generated ports. That way both RoadRunner and iGuidance could listen to the GPS receiver (RoadRunner with DigitalFX has some nifty GPS-based features (pictured above), like a compass, a very accurate speedometer, etc.).

Miscellaneous

No computer software installation is complete without Opera.

Not much else was really needed. TinyXP came prebuilt with Firefox, but I have become an Opera zealot, so I installed that as well. I installed Flash player, then downgraded to what I had previously because the Flash-based RoadRunner started consuming significant CPU resources when using the newer Flash player. I may have installed VLC player and/or the K-Lite codec pack for watching videos (which I never got to work, actually, but video was never a priority for me).

It was fun firing up the carputer on the table and watching it boot directly to the frontend. One of the first things I did was go to my favorite text-to-speech site and make a wav file of the “Mike” voice (who, for reasons I will not explain here, I have named “Sam Leo”) saying “Welcome, Zach.” I then set this as the Windows startup sound. Imagine: car starts. Computer boots. “Welcome, Zach.” Awesome or what?

“Certainly not what!” cleverly chimes AG.

Haha, AG. It was also fun watching the GPS whir to life and tell me that even though I was physically inside my house, in order to get to my house, I would have to drive around the block.

A strong urge to attach wheels to the table and push it around the house, in order to watch the GPS update my position, made me realize it was time to finally install the thing in my car.

NEXT! CARPUTER: THE INSTALLATION!

Wind Generators and General Windiness

My car's inseparable friend.

It has been quite some time since I wrote the previous post. No doubt some loyal readers were wondering such things as:

  • “Did Zach just stay in Utah forever?”
  • “Did Zach ever install his carputer or did he only assemble it?”
  • “Did Zach actually, in fact, die?”
  • “If I had a nickel for every blog post apologizing for not updating frequently enough, how much money would I have?”
  • “Is this project ever going to be finished?”
  • “What’s for lunch?”

I apologize first for making you ask those questions, second for waiting so long to answer them, and third for not giving you a single nickel for this very apology. Because these questions do have answers. Answers such as ‘no’, ‘yes’, ‘no’, ‘more than enough to pay for the rest of my gas’, ‘definitely’, and ‘delicious sushi with a glass of Oolong tea!’

U is for Utah!

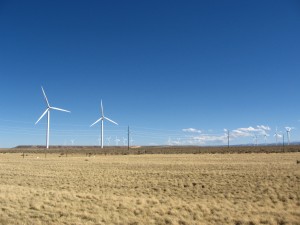
Which ties in nicely to what I was wondering about as I drove out of Utah, very alive and full from a delicious lunch, to continue my amazing project: wind generators. It so happens that I ran across a couple of them on my way.

And behold, the wind generators were spread out before me, as ripe fruit to the harvest.

Okay, it so happens that I ran across a friggin’ slew of them.

You may wonder, were they generating a headwind or a tailwind? When they are all turned up full, they can reputedly generate hurricane-velocity winds. WHOOOOOSH! Just think of how much change this wind farm causes! WHOOOSH! Tote that pail, generate that wind, pitch the council tent...

What was the world like before we had wind generators? What was the world’s weather like with so much less wind? Did we have clouds or only fog? Was the Midwest still windier than the rest of the US?

There they are standing in a row.

Most of the world’s wind generators are located on “wind farms,” huge wind-producing complexes of wind generators, which are also often located close to actual farms. The reason for this is that wind farms, with their ability to generate wind in just about any direction, can effectually control the weather – of course, their direct influence on the weather fades quickly with distance, but the effect is, of course, worldwide (a la butterfly effect). Amazing, what mankind has wrought.

Then I thought about Chicago, dubbed “The Windy City” long before the advent of these marvelous weather-influencing machines. That was a different type of wind, however.

And I felt inspired by both types of wind. Wind. Wind carries the seeds of life from one place to another. Wind makes waves, affecting even the underwater world it cannot directly touch. Wind pollinates plants, carries whispers, lifts the eagle high into the sky, fills a boat’s sails and gives it motion. Wind turns the weathervane of change, and blows the dust from the old and stagnant. The wind completely shapes the unplanted desert, and can wear down even rock with its persistence. Wind.
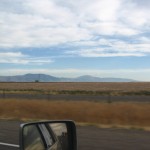
And wind generators, though manmade, are one source of this wind, this agent of life, transportation, and change. And I too can be a wind generator! I will blow my trump and sound my horn and smack my drum to the beat of a different drummer, drumming together with 100 different friends from different cities and cultures. I will carry the seeds of music to places they have never been carried. I will blow a wind that has never been blown. I will bring music around the world and bounce the music of one man off another’s until all the world has connected their ideas in one big celebratory web of human experience.

I believe strongly that music is a language common to all humanity (one of very few such languages), and is therefore something remarkable and unique. With my Recording Tour of Love, I want to promote inter-cultural dialog to an extent impossible using traditional languages. With the wind of this project, I will blow the world together in a collaborative effort heretofore unseen.

Things like this go through my head all the time, I just don’t often write about them because I’m too busy doing something about them.

“Um…”

What is it, Attractive Girl?

“You know that wind generators don’t actually generate wind, right?”

Yeah, so?

“Okay, just making sure.”

Wind Generators: Not Really Generators of Wind

Soon I was out of Utah and on my way to Fort Collins. I was happy to say that getting out of the cattle region of Montana/Utah/Idaho also put this behind me:

Grisly scene of carnage.

NEXT: Carputer… PART DEUX!

Logan, UT

After recording in Idaho a couple posts ago, the next day found me leaving Mountain Home,

This is the one that puts the "Mountain" in "Mountain Home".

hopping on the highway,

This road is what puts the "ghwa" in "highway".

and proceeding towards Utah, which happened to be a scenic drive to rival all scenic drives.

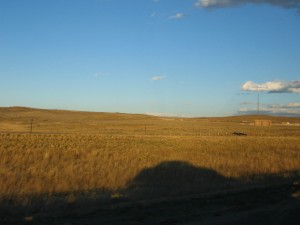
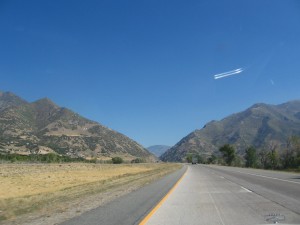
A scenic scene. A scenic scene, obstacled by a bridge. A place where, hypothetically, deer and antelope play. This is a glorious "essence of road trip" type shot. The bug splatters became pretty intense on my way out of Idaho. Man!  Being a good old Nebraska boy, these images never get old for me.

Soon I was entering the part of Idaho known as “The Super Scenic Part That’s Even More Scenic Than the Previous Part.”

Near all the livestock, the bug splatters took on a distinctly bloody color.  I want a steak right now. A lesson in singular perspective.  Lines converge towards a single vanishing point, colors become faded with distance. If I were a cow I would consider this the good life. Idaho: drive-thru safari?

Soon after that, I was crossing over into the part of the U.S. known as “Mormonland.” On maps, however, it is called “Utah.”

The sign says "Logan."  That's where I'm going.

“These scenic scenes are nice, although you probably photoshopped them all,” says Mr. Yerfulovit in his customary growl. “But you still haven’t answered my question.”

That question being…

“What’s in Logan?”

Well, I was originally intending to hit Salt Lake City, which is large and well-known. However, the only people to reply to me in SLC were busy or nonresponsive, and someone had contacted me from Logan, so that’s why I went there.

So, after entering Utah, I turned onto the highway headed down towards Logan,

Headed towards the valley wherein lies Logan.

whereupon I saw Logan stretched before me like a lion in the sun.

Therrrrrrrre's Logan!

A short drive later,

Glancing to the left. Glancing to the left again.

I was in Logan, whereupon I met-

“What the deal, man?” interrupts the mob of teenagers. “Why you all usin’ that fancy English?”

Why you barely using English, homeslice?

“Whatevs, dawg.”

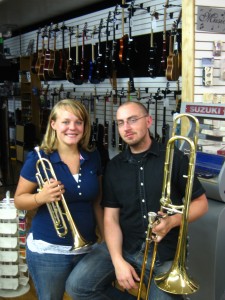
Anyway. In Logan, I met up with my contact and soon to be co-conspirator, Anthony Aronovici. He had contacted me on Couchsurfing, mentioning that he could play some trombone, worked at a music store, and might have some other musical connections I could record. Sounded like good business to me.

“That’s good business,” I said to myself at the time.

“Are you trying to coin new slang?” asks Attractive Girl, with that one-eyebrow-up look that she does.

Stop asking that! Every time you ask that you cast aspersions upon the authenticity of my neophrasology!

“Haha, good one,” she chuckles.

Thanks. So, back to Anthony. I met up with Anthony and several of the happening peeps he lives with, including Kaelee Jensen. Over the course of eating some delicious grilled cheese sandwiches, I explained the project in greater detail and discovered that a) Kaelee also plays the trumpet, and 2) Anthony is totally excited about teaching English in Korea. Anthony was motivated to finish up some classes which would enable him to do just that.

I, on the other hand, was motivated to record them both. So Anthony, Kaelee, and I headed over to the music store where Anthony works and laid down some fine, upstanding horn tracks.

Obelisk of Strength!  That may not sound anything like Tower of Power... but they did. Actually, "Obelisk of Strength" sounds more like a prog rock band than a funk band.  They would do concept albums about ancient monuments.

You may question my use of “fine, upstanding” to describe horn tracks, but I assure you these tracks, if they were citizens, would be the type that recycles, votes, and writes their local paper. They did a great job.

Thanks for playing, guys!

They also hosted me for the night, and barring the unfortunate incident of a roommate’s early, recurring (and apparantly ineffectual) alarm, my stay with them was nothing short of awesome.

See you in Korea, Anthony! Hope you get over here soon.

NEXT: Either Fort Collins, CO or Carputer, Part II, depending on which gets done first.

The Carputer! (Part I: Assembly)

As promised long ago, I need to detail the process of building and installing the carputer, my faithful companion and aide for my bajillions of miles of driving.

The Carputer (of Love?)

Why a Carputer?

Besides the obvious reason that it’s friggin’ sweet, why install a carputer in a 1987 Ford? First of all, consider the fact that I was planning on spending who-knows-how-many-hours in said Ford on this project, driving all over the country. Then consider the fact that I would be driving to a lot of people’s homes that I had never been to before. I may also ocasionally have to find a way to access the internet to figure something out. Then consider the fact that all I had in my car for audio was a measly Clarion 12-disc CD changer powering Pioneer speakers. Ok, so that’s actually pretty nice, but still, I would listen all the way through the first batch of CDs in the first couple days of the Tour. And with the changer in the trunk, switching CDs isn’t something that can be done while driving.

Conclusion: a carputer is awesome (and approaching necessary for my Tour) because 1) GPS navigation, 2) as many mp3s as you can fit on your hard drive, 3) wireless internet, and 4) it’s friggin’ sweet.

So let’s talk about the carputer. I think that in order to effectively cover a process so involved, I’ll need to break it down into sections. Four ought to do it: Assembly, Software, Installation, and Audio. For today, Assembly.

Part 1: Building the Carputer Itself

The Plan

Where do you install a computer in a Crown Vic? Well, here’s my plan in a nutshell.

The computer itself would go under the passenger seat. It’s usually not a recommended location for electronics because of the potential for spills and tracked-in slush/junk, but the trunk is too far away to easily connect the keyboard and screen.

Speaking of the screen — the only actually visible component of the carputer — I thought that would fit nicely right in the middle of the dash. Let me give you a visual aid: a Crown Vic dashboard looks something like this:

Dashing, no?

That’s not from my Vic, because I forgot to get a picture of the dash prior to ripping it open. (Wait, I found one! Kinda. Here it is.)

On the way to Kansas City.  Picture by Mina Kang.

Anyway, you can see that there are two DIN slots there in the dash — the upper one for audio (there’s some crazy aftermarket head unit there in the above pic) and the lower for climate controls. It was my plan to remove my existing head unit, move the climate controls down lower, cut out the separator between the two, and use both slots combined for the 8″ touchscreen.

Power will run down the right side of the car (conveniently, the battery is on the right), with a small branch off for the carputer and continuing into the trunk to power the amp. Audio signal will leave the carputer and travel down the left side of the car (it’s not good to wire audio and power close together) to the amp. Speakers will be mounted in semi-stock locations.

Choosing The Hardware

After a lot of research and lurking on highly informative forums like mp3car.com, I had decided on a few things I wanted for sure. I didn’t want some old desktop computer case strapped down somewhere in my car. I wanted something sexy. I also did not want to get a power inverter to convert my car’s DC power to AC, just so it could get converted back to DC by the computer’s power supply — what a waste. That meant a DC-DC power supply, and at the time the talk around the web was that the best of these was the Opus.

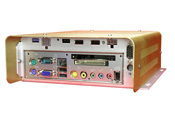
Much more poking around later, and I had found the package I wanted: the Opus 70.

Meets all criteria, including sexiness.

Not only was it made by one of the most respected names in carputing, it came with the exact motherboard and power supply I had decided on, and had a nifty custom aluminum case. Plus other very useful options were available like extra power out for running power to a screen, an adaptor enabling me to connect a laptop hard drive to the motherboard’s IDE connector, RCA audio out, and additional USB connectors.

The Breakdown

From the back.  I'm trying to decide which is the more appropriate descriptor: 'chic' or 'svelte'.
Enclosure: The Opus 70 system comes in a sleek brushed aluminum case. It’s a very simple design, vented on the sides, with a single fan in the back to draw air. It fits under my passenger seat with plenty of room to spare. It’s remarkably space-efficient, too, with the motherboard attaching to the bottom and the power supply and hard drive attaching to the top.

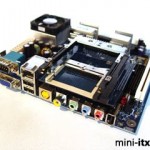
This is one bad mobo.  Er, mofo.  Er, mug.
Mainboard: The Via EPIA MII12000G is tiny, able to generate very little heat and consume very little power, and has a host of connectors, including slots for PCMCIA and CompactFlash cards. It also has additional onboard connectors for expanding your options with additional USB or audio connections, which the Opus 70 takes advantage of.

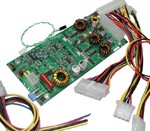
This is the smallest power supply I own.
Power Supply: The reason I even found the Opus website to begin with was because of their reputation as making the best DC-DC power supplies for carputers around. The system I got came with a DCX3-120-H, which is to say, a 120-watt power supply with a host of features, the most important being configurable intelligent switching for automatically turning the carputer on/off with ignition, and protection to prevent damaging or rebooting the system during engine cranking (when voltage to the rest of the car drops considerably).

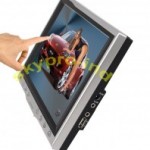
This is the only decent picture I could find.  I got mine in black, however.
Touchscreen: In my eBay searches I came across a reseller selling SkyPro DL-800‘s, which are cheap 8″ TFT/LCD touchscreens made in Hong Kong, yet with seemingly superior features (higher native resolution, markedly brighter) to the most commonly-used touchscreens I read about in my research (namely, those by Lilliput and Xenarc). I felt a bit nervous about this particular decision, but my worries ended up being needless.

My hard drive came with (but not on) a silver platter.
Hard Drive: I had been waiting and waiting for laptop hard drives to be available in sizes larger than 160GB, because I just knew the instant I got the 160GB drive they would release the 200+ giggers. At the time I was researching components, perpendicular recording technology for laptop drives was just hitting the consumer market, and the drives were still pretty pricey. Thankfully, that was before I went to Korea for my first year of teaching over there, and by the time I came back to the US in the spring of 2008, prices were more reasonable and — AND — there was a Seagate Momentus laptop drive available in 250GB, which I promptly ordered from Newegg. (I only buy Seagate hard drives. WD always offers the best price per GB, but after my second WD drive failed — exactly one week after the warranty expired — I switched to Seagate and haven’t looked back.)

This is exactly what mine looks like.
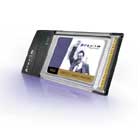
Wireless Internet Solution: The problem with most peripheral options for wireless solutions is that when they are placed in the trunk of a car, or under a car seat, which happens to be where a lot of carputers reside, they don’t get good reception for some reason… Certain PCMCIA wireless cards, however, have a connector for an external antenna, and the standard carputing wireless solution seemed to be the Orinoco Gold PCMCIA wireless card (which I believe is now sold by Proxim) with an external antenna of some kind. So I eBayed such a card, along with such an antenna. A PCMCIA slot for this purpose is part of the reason I chose Epia’s MII motherboard.

You can roll it like sushi!
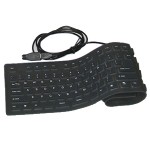
Keyboard: I love full-size keyboards, because as a programmer I use the numpad all the time for navigation. Problem: most of the time the keyboard would be tucked away under the seat, so the keyboard can’t be a big long unyielding rectangle. It should also be water-resistant if not waterproof. Solution: the flexible rubber keyboard! It can actually sit on the floor between the seats, contouring itself to the driveshaft lump. I also picked this up on Newegg for a very reasonable price.

Mine looks just like this.
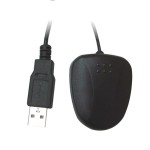
GPS Receiver: I eBayed myself a USB GPS receiver. I don’t remember the brand, but it had specifications that seemed to be equal to the tasks I expected of it. I wanted this to go on the back deck, which meant I also had to get a USB extension cable for it, which I didn’t get until Minneapolis (it was just sitting on my dash until then, with an unsightly cable dangling around). Buying cables from Best Buy is expensive!

Handy-dandy!
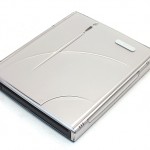
CD/DVD Drive: The computer doesn’t have room inside it for an optical drive, so I had to get an external one. Problem: I only have one USB port to spare, and most external DVD drives require two — one for signal and one for extra power. The solution I found was a handy-dandy enclosure from Meritline featuring a rechargeable lithium-ion battery. The battery supplies whatever power is additionally needed, and recharges from the single USB connection whenever the drive is idle. I bought it with a Sony CD+-R/DVD+-R laptop drive pre-installed, thinking I was getting a slot-loading drive (awesome for carputers) but instead getting a regular tray-loading drive (not so awesome). If I planned on using the drive for much besides installing software and occasionally ripping audio CDs, I could have probably made a stink and gotten it swapped back, but I am not stinky.

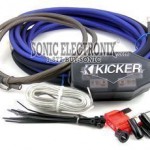
This is the exact wiring kit I got, although mine didn't come with a watermark for some online store floating over it.
After getting all of those essential components, there were just a few things left, mostly consisting of wires and tools and extensions for things. I visited Stereo West, the local car audio mecca, to get advice on wiring and choosing an amp/speakers (which you’ll hear about later). They talked me through wiring options and gave me some good recommendations. I picked up an 8-gauge Kicker wiring kit while I was there. They were nice and threw in a handful of random wires from around the shop for me too, saving me an additional trip to the hardware store.

The Testing Facility, a.k.a. “Dining Room Table”

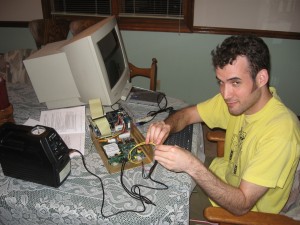
Once I had all the parts, it was time to see how the parts played together. I connected the essential parts together, borrowed a 12v battery and a monitor from my dad (normally used to help jump-start cars), and held the Opus’ power wires to the appropriate places on the power plug, which was a bit tricky.

Testing, testing, 1, 2 aww dangit.

Once I figured out which lines all needed power, the computer whirred to life, and I was able to start installing software.

Part 2 (up later): Software.

한국에 도착!

I have a couple minutes to pop in and let you know a couple juicy news tidbits:

  1. I am pleased to report that my previous post is already the top result on Google for the search terms “couch surfing zach bardon girls”! Future searches for these terms will now be much more fruitful.
  2. I arrived in Korea (finally — after about two months of waiting for the immigration office to get me my visa) about 24 hours ago. I am pleased to report a fantastically delicious inaugural meal of 감자탕 (spicy pork and potato soup).
  3. I got here right in the middle of one of Korea’s major holidays — 설날, the lunar new year! It’s a three-day holiday, quite long by Korean standards. So I don’t have work for a few days, but I can’t work on mixing until I can go shopping when the holiday is over. (I need to get a power converter to be able to use an essential piece of my equipment.) What’s more, my phone needs to be reactivated so I can’t call all my Korean friends to hang out yet either. So the next few days should see a flurry of blog activity.

Until a few hours later, my friends.

COMING IMMINENTLY: The Carputer, Part I.